

A Gas Tank Cap is a small part with an important job: it helps seal the fuel system and keep dirt and moisture out of the filler neck. When a cap is cracked, missing, or unable to tighten properly, fuel odors or a warning light may follow. The exact symptoms vary by vehicle, so a cap is not always the cause. Small part. Big job.
This guide to the 10 best gas tank caps for cars and trucks compares practical details that matter, including fitment, seal design, materials, and ease of installation. Some caps are made for specific models, while others are listed as replacements for a range of vehicles. That does not guarantee a match. Check your owner’s manual, vehicle details, and product compatibility information before buying. A cap that looks right may still fit poorly; it is an easy detail to miss.
The right choice should install securely without forcing the threads or leaving the cap loose. Consider how you use your vehicle, too. A work truck exposed to dust and frequent refueling may have different needs from a commuter car kept in a garage. Product descriptions can be incomplete, and ratings do not prove that a cap will suit every vehicle. This overview is a starting point, not a substitute for checking fit. If a warning light remains after a correct replacement, have the vehicle’s fuel-system issue diagnosed rather than assuming the cap is responsible.
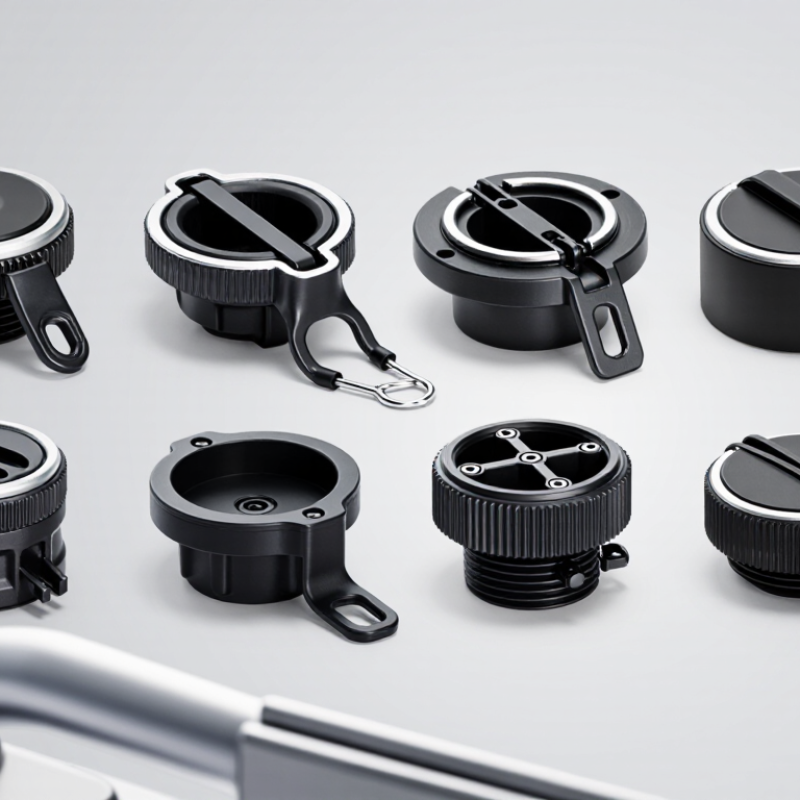
A gas tank cap is a small seal with a demanding job. It closes the filler neck and helps keep fuel vapors inside the vehicle’s evaporative-emissions system. Without a secure seal, vapors may escape, and the onboard diagnostic system may detect a leak. On many modern cars and trucks, that can trigger a check-engine light. The cap also helps keep dust and moisture away from the filler opening. Small part. Real job. Still, a cap cannot repair a cracked hose or faulty purge valve.
The U.S. Environmental Protection Agency’s Tier 3 vehicle standards set an evaporative-emissions limit of 0.3 grams per test for light-duty vehicles, phased in starting with model year 2017. That figure covers the vehicle’s emissions-control system, not the cap alone. A properly fitting, undamaged cap is one piece of that system. Check its gasket for flattening, splits, or grit, and make sure the cap tightens as designed. If it feels loose or the warning light stays on, have the vehicle’s leak codes checked rather than assuming the cap is the only cause. It is easy to blame the simplest part; sometimes that guess is wrong.
Common Types of Gas Tank Caps and Their Features
Gas tank caps vary by vehicle design, so the right type is the one specified in the owner’s manual. Traditional sealed caps use a rubber gasket to help keep fuel vapors contained and prevent dirt from entering the filler neck. Many have a tether, which keeps the cap from being misplaced during refueling. Some produce a series of clicks when tightened, but not every design works the same way.
Locking caps add a key-operated mechanism, though fit and sealing performance matter more than the lock alone. Older vehicles may use vented caps, while many modern fuel systems require a sealed cap matched to the vehicle’s pressure and emissions system. Capless fillers use an internal flap instead of a removable cap. They are convenient, but the flap and surrounding area still need occasional inspection. A small detail, yet easy to overlook.
Tips: Check the manual before replacing a cap. Inspect the gasket for cracks, flattening, or dirt, and tighten the cap as directed. If a warning light remains on, don’t assume the cap is the only cause; have the fuel system checked.
Typical design features of common fuel-filler closures. A value of 1 means the feature is typically present; 0 means it is typically absent.
Standard, locking, and tethered caps are typically removable threaded closures. Locking caps add a key-operated lock, while tethered caps remain attached to the vehicle. Capless systems use an integrated closure instead of a separate removable cap. Designs and optional features vary by vehicle, so check the owner's manual for the correct replacement.
A fuel cap is small, but fit means more than matching the threads. Check the owner’s manual or a fitment catalog using the vehicle’s year, make, model, engine, and fuel type. Compare the original cap’s neck, locking tabs, tether, and gasket. On a cool, parked vehicle, look for cracks or a flattened seal. Threaded caps should turn smoothly and seat without force. Push-on caps need the correct locking shape. A clicking sound alone does not prove a cap fits.
EPA’s OBD regulations require evaporative-system monitoring; applicable newer gasoline vehicles can be calibrated to detect leaks equivalent to about 0.020 inch (40 CFR §86.1806-05). That tiny gap helps explain why a slightly mismatched seal may trigger a warning light. Choose a cap listed for the exact vehicle, then check that its gasket sits evenly and the cap closes securely. Fitment databases can be imperfect, especially across trims or midyear changes. If listings disagree, verify the part number in service information. No need to overtighten. If the warning stays on after several trips, have the system tested rather than repeatedly replacing the cap.
A useful comparison of ten gas tank caps starts with fit, not appearance. Standard threaded caps suit many older filler necks, while ratcheting designs help signal when the cap is tightened. Tethered caps are harder to misplace, though the strap can snag or wear. Locking caps add a key mechanism, but they may be less convenient at frequent fill-ups. Fit comes first.
Other designs serve narrower needs. A replacement for a capless filler works only on vehicles built for that system. Metal-bodied caps can feel sturdy, while lightweight plastic versions are easier to handle. Some caps emphasize a low profile; others use larger grips for easier removal. Seals and pressure-control features matter more than color or finish. A poor seal can trigger a warning light or allow fuel vapors to escape.
Before choosing among the ten, check the vehicle’s year, make, model, and filler-neck requirements in its manual or parts information. Similar-looking caps are not always interchangeable. It is easy to focus on a reassuring click and miss the fit details. That deserves a second look. A cap should seat evenly, stay secure, and come off without excessive force; if it does not, verify compatibility rather than forcing it.
10 Best Gas Tank Caps for Cars and Trucks?
A gas tank cap should seal cleanly without force. Park the vehicle, switch off the engine, and remove the cap slowly. Check the rubber seal for cracks, flattening, or dirt. Look inside the filler neck for grit or damage, too. A small tear can matter. I’ve found that a quick glance is easy to rush, so use good light and take a moment.
To install a replacement, confirm it fits your vehicle’s year and model using the owner’s manual or a reliable parts reference. Place it squarely on the filler neck and turn it until secure. Some caps click; others do not. Don’t keep tightening once it is seated. If the warning light stays on after replacement, the cap may not be the cause. A mechanic can check the fuel-vapor system.
Tips: Keep the cap and your hands clean during inspection. Avoid forcing a cap that feels cross-threaded. If the tether is damaged, make sure it cannot snag or interfere with closing the fuel door. A little patience helps. It is not a complicated job, but I still double-check the seal before driving away.
| No. | Cap type | Best suited for | Fitment and key features | Installation, inspection, and replacement |
|---|---|---|---|---|
| 1 | Vehicle-specific, non-locking cap | Cars and trucks originally equipped with a standard non-locking cap. | Choose a cap that matches the vehicle’s application and filler-neck design. Thread pattern, sealing surface, and any emissions-system requirements must be correct. | Place it squarely on the filler neck and tighten as directed by the vehicle manual. Check the seal for cracks, hardening, or flattening; replace the cap if it is damaged or does not seal properly. |
| 2 | Vehicle-specific locking cap | Drivers who want a keyed cap where the vehicle is designed to accept one. | Must match the vehicle’s filler neck and emissions requirements. Keep the key accessible and check that the lock turns without binding. | Install according to the cap instructions and confirm it closes securely. Replace a cap with a damaged seal, jammed lock, or incorrect fit; do not force it onto the filler neck. |
| 3 | Tethered cap | Vehicles designed for a cap attached to the fuel door or filler area. | The tether helps keep the cap from being misplaced. Tether length and attachment style vary, so verify compatibility with the vehicle. | Make sure the tether does not become trapped between the cap and filler neck. Inspect both the tether and sealing gasket; replace the cap if either is damaged or the seal no longer seats evenly. |
| 4 | Untethered replacement cap | Vehicles that use a separate cap without a tether. | A straightforward replacement option when the original design is untethered. Match the application rather than relying on appearance alone. | Keep the removed cap in a clean place while refueling. Before installation, check the filler-neck rim for dirt or damage and inspect the replacement gasket for cuts or distortion. |
| 5 | Emissions-system-compatible replacement cap | Vehicles with an evaporative-emissions (EVAP) system that requires a compatible sealed cap. | Use a cap specified for the vehicle and applicable emissions requirements. A cap that fits physically may still be unsuitable if its sealing or pressure characteristics differ. | Install and tighten as specified in the owner’s manual. If a check-engine light or fuel-cap warning appears, check the cap’s fit and seal; a warning can also have causes elsewhere in the EVAP system. |
| 6 | Vented cap for a designated legacy system | Older vehicles whose original fuel system is specifically designed to use a vented cap. | Vented and sealed caps are not interchangeable by default. Use this style only when the vehicle specification calls for it. | Confirm the required cap type in service information before fitting. Inspect the vent openings for blockage, but do not modify or drill a cap to change its venting. |
| 7 | Pressure- or vacuum-relief cap for a specified application | Vehicles whose design explicitly assigns pressure or vacuum relief to the fuel cap. | Relief settings and system designs vary. Many vehicles manage tank pressure through other EVAP components, so this cap is appropriate only when specified for the application. | Do not select one by appearance or assume that a relief feature is required. Follow vehicle service information and replace the cap if its seal or specified function fails inspection. |
| 8 | Diesel-specific cap | Diesel cars, pickups, and vans with a conventional capped filler neck. | Choose a cap designed for the vehicle’s fuel-filler opening and system. Diesel filler-neck sizes and cap designs vary; a diesel label alone does not guarantee fitment. | Check that the cap seats securely and that its seal is clean and undamaged. Replace a missing or poorly fitting cap with one verified for the vehicle. |
| 9 | Heavy-duty truck cap | Commercial and heavy-duty trucks that use a conventional fuel cap. | Confirm compatibility with the truck’s specific filler neck and fuel-system design. Some trucks have different cap requirements between vehicle configurations or fuel tanks. | Follow the truck manufacturer’s installation instructions. Inspect the cap seal and filler-neck edge during routine maintenance, and replace parts that are cracked, distorted, or unable to seal. |
| 10 | Universal or adjustable replacement cap | Only applications for which the cap instructions explicitly confirm a correct fit. | “Universal” does not mean compatible with every car or truck. Check the application, sealing design, and emissions requirements before purchase; avoid it if compatibility cannot be verified. | Test that the cap seats and seals as intended without force. If it feels loose, sits crooked, or does not match the specified cap type, remove it and use a verified vehicle-specific replacement. |
Important: There is no single gas-cap size or design that fits all vehicles. Check the owner’s manual or reliable vehicle-specific service information before buying a replacement. For installation, follow the cap and vehicle instructions; some designs click when tightened, while others use a different closing method.