


Choosing the right Strip Light in 2026 requires more than comparing brightness and price. The best choice depends on the room, surface, color goals, controls, and installation conditions. A kitchen backsplash needs clean, shadow-free light. A display cabinet may need high color accuracy. Outdoor steps require stronger protection against moisture, dust, and temperature changes.
Lighting engineer James Benya offers a useful principle: “Design the light for the task, not the fixture.” That advice remains practical today. Start with the room. Measure the channel length and check the available power supply. Then compare color temperature, color rendering index, wattage, voltage, dimming support, and heat management. A 24V Strip Light often supports longer runs with less voltage drop, but it still needs suitable aluminum mounting channels. Never hide high-output tape inside a sealed space without considering heat.
Look closely at the details. A warm 2700K tone can soften a bedroom, while 4000K may suit a workbench. For artwork, a CRI of 90 or higher can preserve subtle colors. Waterproof ratings also need careful reading. IP65 may resist water spray, but it does not automatically suit constant immersion. Do not guess.
Personal experience shows that many failures begin with rushed planning. I once underestimated connector space and created visible dark sections near a cabinet corner. The lighting worked, but the finish looked unfinished. That small mistake matters. In 2026, smart controls, tunable white options, and efficient LEDs offer more flexibility, yet better technology cannot replace accurate measurements and honest installation planning.
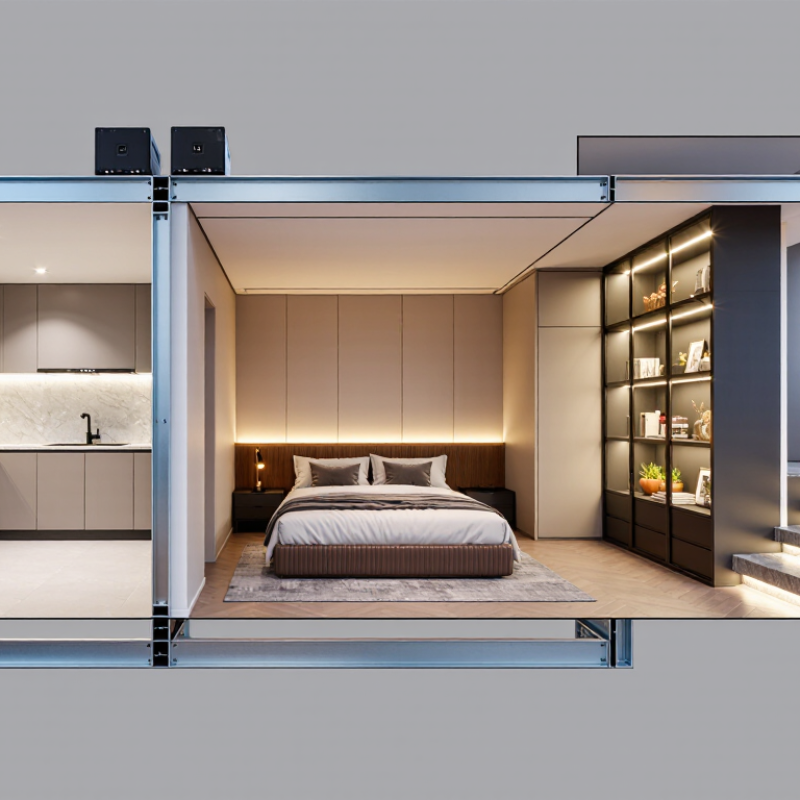
Define the lighting purpose before comparing specifications. Task lighting needs more useful lumens than decorative coves. For kitchen counters, choose high CRI, preferably 90 or above. A neutral 3500–4000K tone supports clearer food preparation. Bedrooms often suit 2700–3000K, but personal sensitivity still matters. The International Energy Agency reports that lighting consumes about 15% of global electricity. Efficient LEDs and sensible controls therefore deserve attention. A timer cannot fix poor placement.
Study the space carefully. Record the length, surface color, viewing distance, and available daylight. Choose lumens per meter, not wattage alone. U.S. Department of Energy solid-state lighting research emphasizes efficacy, optical quality, thermal management, and controls. Dense LED spacing usually reduces visible dots. Aluminum channels can improve heat control and visual consistency. They also increase cost. Measure twice.
Installation requirements can change the selection completely. Confirm voltage, power-supply capacity, dimmer compatibility, bend radius, and connector access. For bathrooms or outdoor areas, match the IP rating to real moisture and dust exposure. Long runs may suffer voltage drop, creating a dim tail. Feed power from both ends only when electrical instructions permit it. IEC 60598-1 offers a useful safety reference, while local rules still control installation. I have seen attractive plans fail because the channel was too shallow. That detail is easy to miss. Test the entire run before fixing the adhesive.
Choosing a strip light starts with its purpose, not its appearance. Single-color strips suit shelves and work areas, while tunable white models support changing moods. RGB strips create colored effects, but they often produce weaker white light. RGBW versions add a dedicated white diode and usually render neutral tones more naturally. COB strips can look smoother because their light points blend closely together. SMD strips may offer easier replacement and wider product choices.
Check brightness in lumens per meter, not watts alone. A reading nook may need about 500 to 1,000 lumens per meter, depending on distance and shade. Under-cabinet lighting needs even output without harsh dots. A diffuser helps, but it can reduce brightness. Measure twice. I once selected a powerful strip for a shallow cabinet, and the reflected glare became uncomfortable. The specification was correct; the application was wrong.
Color temperature changes the room’s character. Around 2700K feels warm, while 4000K looks cleaner for cooking or detailed work. For photography, art, or skin tones, choose a CRI of 90 or higher and check R9 performance. TM-30 data can reveal weaknesses that CRI hides. Ask for a sample and test it beside real materials. Color accuracy is not only a number. Wood, white paper, and red fabric may still look different. A perfect choice on paper can disappoint in person.
How to Choose the Right Strip Light in 2026?
Start with voltage. Match the strip light voltage to the power supply exactly. A mismatch can cause flickering, overheating, or early failure. For longer installations, higher-voltage systems often reduce current and voltage drop. Measure the full route, not just the visible section. A five-metre strip may need power from both ends. I learned this after one installation looked bright near the supply but dull at the far end.
Check the power rating in watts per metre. Multiply that figure by the planned length, then add about 20% spare capacity. For example, a 10-watt-per-metre strip running eight metres needs at least 80 watts. A 100-watt supply gives safer operating room. Do not hide the supply in a sealed, hot cavity. Heat shortens its working life. Length also affects cutting and control. Follow the marked cut points, and keep separate runs within the recommended maximum. Longer runs can need parallel wiring or multiple feeds.
Look closely at the installation site. Kitchens, bathrooms, and outdoor areas may require suitable moisture protection. However, stronger protection can reduce flexibility and affect heat release. That trade-off is easy to overlook. I would also recheck the measured length before ordering; walls, corners, and connectors consume space. A small planning error can leave an obvious dark gap. Test a short section first. It may reveal a colour, brightness, or heat issue before the entire run is installed.
How to Choose the Right Strip Light in 2026?
Waterproofing starts with the installation location, not the product photograph. An IP65 strip resists dust and water jets, but it is not designed for immersion. IP67 allows temporary immersion under defined test conditions, according to IEC 60529. Bathroom ceilings, outdoor steps, and poolside areas need different protection levels. I have seen sealed strips fail because their cut ends were left exposed. Use matching end caps and sealant. However, sealing every joint can trap heat.
Heat control strongly affects brightness and service life. The U.S. Department of Energy’s 2023 Solid-State Lighting R&D Opportunities report identifies thermal management as a major LED performance priority. Mount high-output strips on an aluminum profile, not directly on painted wood. Leave ventilation around the power supply. I usually keep about 20% driver capacity unused, though this is a practical margin rather than a universal rule. A cooler touch does not always mean a cool LED junction.
Controls and compatibility deserve equal attention. The IEA’s Energy Efficiency 2023 report estimates that lighting consumes about 15% of global electricity. Dimming can reduce waste, but only when the driver, controller, voltage, and load type match. Check constant-voltage requirements, PWM frequency, maximum current, and control protocol. Flicker may appear at low brightness. Test the complete setup before permanent mounting. I still find compatibility charts incomplete, so measuring voltage and temperature on site remains worthwhile.
| Application | Recommended Protection | Heat-Control Requirement | Typical Electrical Specification | Control Compatibility | Installation Guidance | Key Selection Check |
|---|---|---|---|---|---|---|
| Dry indoor areas Bedrooms, offices, shelves | IP20 or equivalent open-board construction; no protection against water. | Use an aluminium profile for continuous operation or strips above approximately 9.6 W/m. | 12 V or 24 V DC; 4.8–14.4 W/m is common; select the power supply with at least 20% spare capacity. | Compatible with constant-voltage dimmers, PWM controllers, timers, and smart relays rated for the same voltage and load. | Keep away from condensation. Mount on a clean, dry surface and provide ventilation around the power supply. | Prioritise colour quality, brightness, cut length, and profile size rather than water resistance. |
| Kitchens and bathrooms Under cabinets, mirrors, vanity areas | IP44–IP65, depending on exposure. IP65 protects against water jets when correctly sealed. | Use an aluminium channel with a diffuser to spread heat and protect the strip from splashes. | 24 V DC is preferred for longer runs because it reduces voltage drop compared with 12 V systems. | Use a moisture-suitable controller; keep mains-powered control equipment outside wet zones unless specifically approved. | Seal end caps and cable entries. Do not rely on the strip’s IP rating if cut ends are left unsealed. | Check the actual wet-zone location, cut-end sealing method, and local electrical requirements. |
| Outdoor covered areas Porches, eaves, covered signage | IP65 for water jets; IP67 for temporary immersion protection when the complete assembly is properly sealed. | Use a weather-resistant aluminium profile. Silicone-coated strips may retain more heat than bare-board versions. | 12 V or 24 V DC; calculate voltage drop over the full cable and strip length before installation. | Select outdoor-rated connectors, controllers, and power supplies with suitable operating-temperature ranges. | Protect power supplies from direct rain and provide drip loops in cables. Avoid placing sealed strips in trapped heat. | Confirm UV resistance, temperature range, connector sealing, and the rating of the complete system. |
| Gardens and exposed locations Pathways, façades, landscape accents | IP67 or IP68 may be appropriate, but IP ratings apply only under the test conditions stated for the product. | Use low-to-moderate power density or a metal profile rated for outdoor use; prevent water from collecting around joints. | 24 V DC is generally easier to manage for long outdoor runs; use appropriately sized low-voltage cable. | Controllers must be protected in a suitable enclosure and rated for the strip’s current, voltage, and channel count. | Use sealed connectors and junction boxes. Do not cut or bend the strip beyond the manufacturer’s specified limits. | Verify UV stability, impact resistance, drainage, minimum bend radius, and replacement access. |
| Long architectural runs Coves, corridors, commercial interiors | IP20 for dry concealed spaces; choose a higher rating only when moisture protection is required. | Install continuously in an aluminium profile. Use parallel power injection when the run exceeds the strip’s recommended feed length. | 24 V DC; select the supply from total watts: strip length × watts per metre, then add at least 20% capacity. | For dimming, use a PWM controller or constant-voltage dimmer that matches the control protocol and total current. | Plan access points, cable routes, voltage-drop limits, and thermal expansion before fixing the profile. | Check uniformity, maximum continuous length, feed-point spacing, dimming frequency, and driver capacity. |
| Colour-changing installations Mood lighting, events, media rooms | IP20 indoors; IP65 or higher for areas exposed to moisture, with sealed RGB/RGBW connectors. | Use an aluminium profile, especially for high-density RGBW strips, because multiple colour channels can increase heat output. | 12 V or 24 V DC; RGB typically uses three channels, while RGBW uses four channels and needs a compatible controller. | Match analogue RGB/RGBW, addressable-data, or DALI/DMX control systems correctly; these are not interchangeable. | Confirm wiring order, controller channel capacity, data direction for addressable strips, and signal-loss limits. | Identify the strip type first: single-colour, tunable white, RGB, RGBW, or individually addressable. |
| High-brightness task lighting Worktops, retail displays, workshops | IP20 in dry areas; use IP44–IP65 if cleaning spray or splashing is expected. | An aluminium profile is essential for sustained high output. Avoid mounting directly to wood, plastic, or painted surfaces without heat spreading. | Commonly 24 V DC at 14.4–28.8 W/m; verify the power supply’s continuous current rating and ventilation. | Use a dimmer rated above the calculated load; choose a flicker-controlled driver for camera-facing or precision work. | Use a diffuser to reduce glare and maintain consistent spacing from the illuminated surface. | Compare lumens per metre, colour rendering, glare control, thermal path, and expected operating hours. |
Choosing a strip light in 2026 requires more than checking brightness. Safety, lifespan, energy use, and total cost should be measured together. In real installations, overheating often begins at tight bends, covered profiles, or undersized power supplies. Select a product with clear electrical ratings, thermal guidance, and independent testing against relevant safety standards. UL 2108 and IEC 60598-2-20 are useful references for low-voltage lighting systems.
Lifespan claims need careful reading. LED packages may last 50,000 hours, but the strip, adhesive, solder joints, and driver can fail earlier. The U.S. Department of Energy explains that LED performance depends strongly on temperature and current. Therefore, look for LM-80 and TM-21 evidence, not only marketing estimates. Energy use also varies by brightness. The U.S. Environmental Protection Agency reports that LEDs can use at least 75% less energy than incandescent lighting and last much longer. Still, a bright strip running all night can waste energy.
Tips: Measure watts per metre at your chosen brightness. Add the driver, dimmer, aluminium channel, installation, and replacement costs. A cheaper strip may become expensive after two driver failures. I would also leave ventilation space around the power supply. That detail is easy to miss. Payback calculations are imperfect because electricity prices and operating hours change. Test a one-metre sample first, then inspect heat, color consistency, and voltage drop before buying a full reel.